

Manage webhook endpoints
Add an endpoint that receives consent events, keep its signing secret, and check deliveries, retries and automatic disabling.
A webhook is a signed message sent to your server when something happens, such as a person withdrawing consent. Add an endpoint for each server that must hear about it. Endpoints belong to the whole project and receive events from every property.
Add an endpoint#
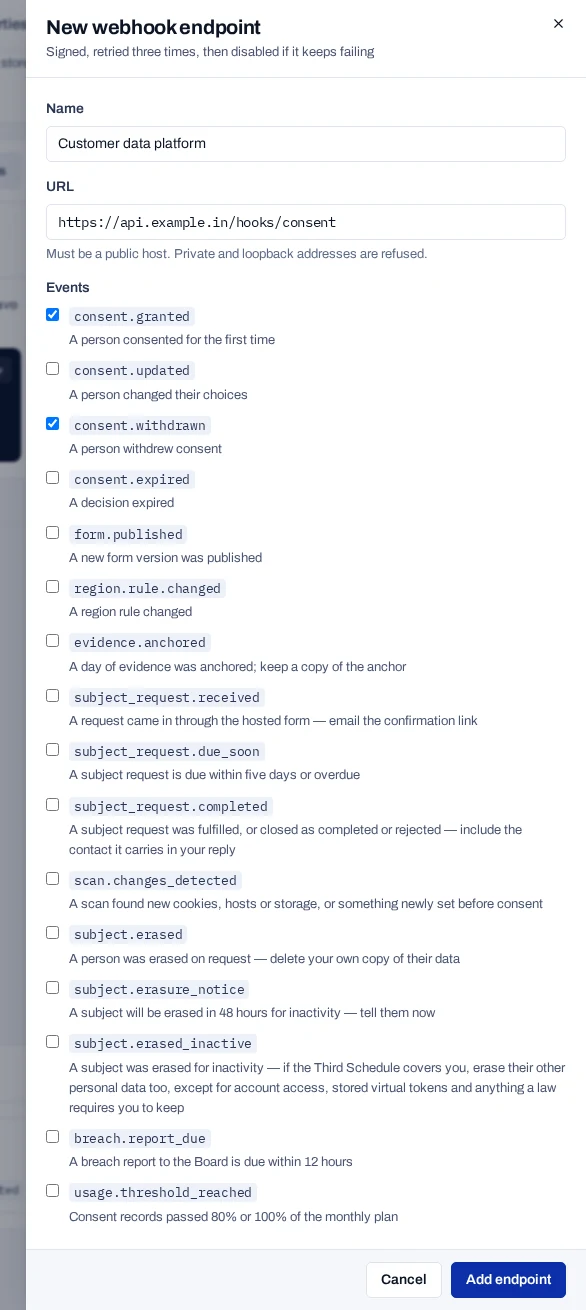
- Open Install and scroll to the Webhooks panel.
- Choose Add endpoint.
- Under Name, type what the endpoint is for, such as
Customer data platform. - Under URL, type the address your server listens on, such as
https://api.example.in/hooks/consent. - Under Events, tick each event the endpoint should receive.
- Choose Add endpoint.
- Copy the Signing secret from the Endpoint created panel and give it to your developers.
The address must be a public host. Use an https:// address so that messages are encrypted on the way. On your own deployment, an address on your own network works when whoever runs it listed that network in PRIVATE_NETWORK_ALLOWLIST. Turn on Private network address for that endpoint. Other private, loopback and cloud metadata addresses are refused.
The signing secret is shown once
The secret starts whsec_. If you lose it, delete the endpoint and add it again to get a new one.
Choose the events#
consent.granted and consent.withdrawn are ticked to start with. The panel describes every event. Four matter most:
consent.withdrawntells the systems that use the data to stop.subject_request.receivedcarries the link a person must confirm. The product sends no email itself.subject.erasure_noticemust have an endpoint before Erase after inactivity erases anyone.evidence.anchoredgives you each day's signed anchor to keep, andcampaign.anchoredeach day's signed root of notice answers.
To change an endpoint's events, delete it and add it again. The new endpoint gets a new signing secret.
Test and live events go to the same endpoints. Every message carries a test flag, so your server can keep test events out of live systems.
Turn off or delete an endpoint#
Use the switch on the right to turn an endpoint off or on. The console shows Endpoint disabled or Endpoint enabled. Delete removes the endpoint.
Events that happen while an endpoint is off, and messages still waiting for it, are kept as failed for 30 days. Once it is on again, send them with Replay failed webhooks. The endpoint's row shows how many failed.
Check deliveries#
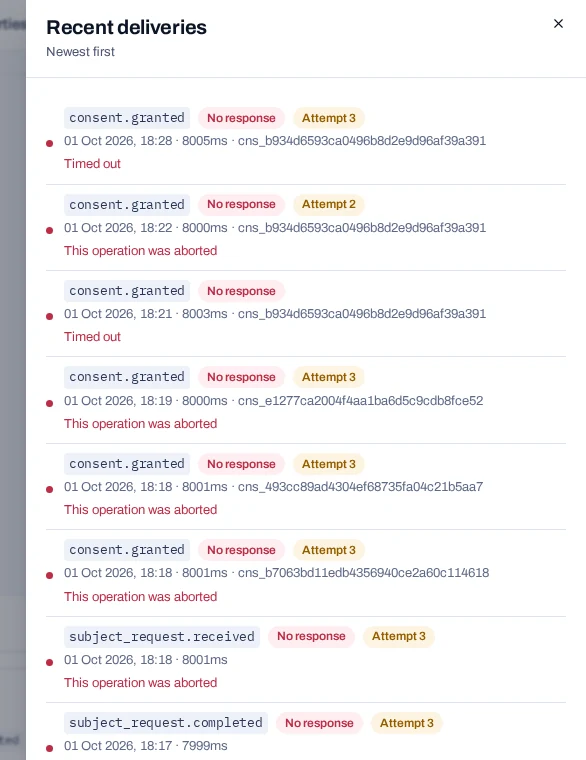
Choose Recent deliveries to see the latest 40 attempts, newest first. Each line shows the event and your server's answer, such as HTTP 200 or No response. A retry is marked Attempt 2, Attempt 3 and so on.
A delivery counts when your server answers with a status from 200 to 299 within eight seconds. Delivery logs are kept for 30 days.
Retries and automatic disabling#
A failed message is tried again after 1 minute, 5 minutes, 30 minutes, 2 hours, 6 hours and 12 hours. That makes seven attempts over about 21 hours.
If all seven fail, the endpoint gains one failure, shown as a badge such as 3 failures. After 10 failures in a row, the endpoint is turned off and shows Disabled. One delivery that works sets the count back to zero.
To bring an endpoint back, fix the receiving server, then turn the endpoint on with its switch. That clears the failure count.
A message can arrive more than once, and a retry can arrive after a newer message. Ask your developers to handle both.