

Set up your first banner
Take a new project from nothing to a consent banner for visitors in India and the first recorded answer, using the console.
Take an empty project to a banner that asks visitors in India for consent and records what they answer. It takes about 30 minutes in the console, plus one script tag on your site.
Before you start#
Have these ready:
- The address your site is served from, such as
https://shop.example.in. - The link to your privacy policy.
- A privacy contact email address.
- The address of the page where a person can complain to the Data Protection Board of India.
- Someone who can add one script tag to the site.
The quick way: Set up a site#
Open Properties and choose Set up a site. Five short steps take you from the address of your site to a published banner and its script tag. Each step saves as you go, and nothing has to be published twice. The rest of this page does the same by hand, for when you want to choose each detail.
Create a property#
A property is one site or app. Its consent forms, keys and records belong to it.
- Open the console at https://console.dpconsent.com.
- Open Properties and choose New property.
- Enter a Name, such as
shop.example.in. - Under Website addresses, enter each address the site is served from, one per line.
- Enter the Privacy policy URL.
- Choose Create property.
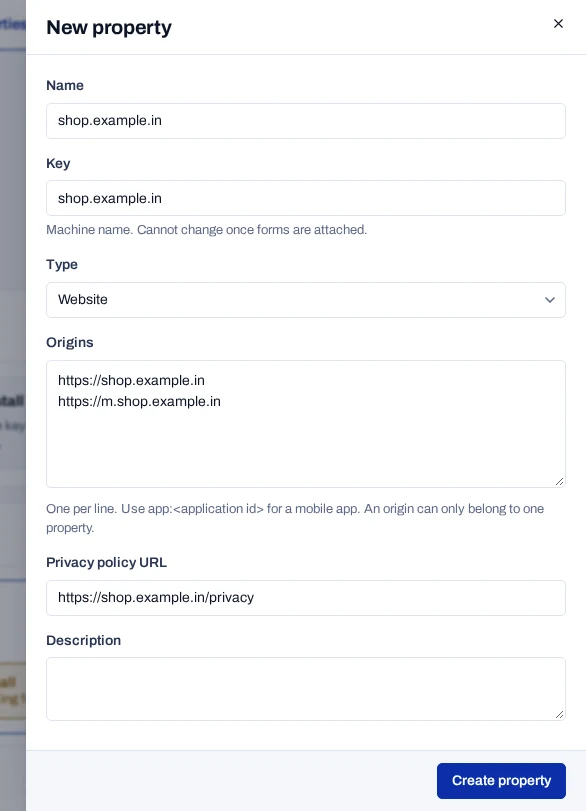
The console confirms with Property created. The property now has a card under Properties.
Add your privacy contact#
A form shown in India cannot be published without a privacy contact.
- Open Settings.
- Under Identity, enter the Privacy contact email address.
- Choose Save settings.
The console confirms with Settings saved.
Add your purposes#
A purpose is one reason you use personal data, such as analytics. The project keeps its purposes in one list, the purpose registry. A new form starts with every purpose in it, so add them first.
- Open Settings, then Purposes.
- Choose Add from library.
- Tick Strictly necessary, Analytics and Marketing, and choose Add selected.
- Select Analytics and check its Description, Data used and Partners against what your site does.
- Choose Remove beside each partner you do not work with, then choose Save changes.
- Do the same for Marketing.
- Select Strictly necessary and choose a clause under Legitimate use relied on in India (DPDP Act section 7).
- Choose Save changes.
The list now shows three purposes. Strictly necessary is not based on consent, so a notice in India has to name the legitimate use it relies on. Which clause fits is your decision. Add purposes explains every field.
Create a consent form#
A consent form holds what you ask and the wording you ask it in. The banner is one type of form.
- Check that the property picker, at the left of the tab bar, shows your property.
- Open Consent forms and choose New consent form.
- Choose Cookie and tracking consent.
- In Wording, change the Form name, Heading and Body to suit your site.
- Fill in Complaint link text and Complaint link URL.
- Choose Save draft.
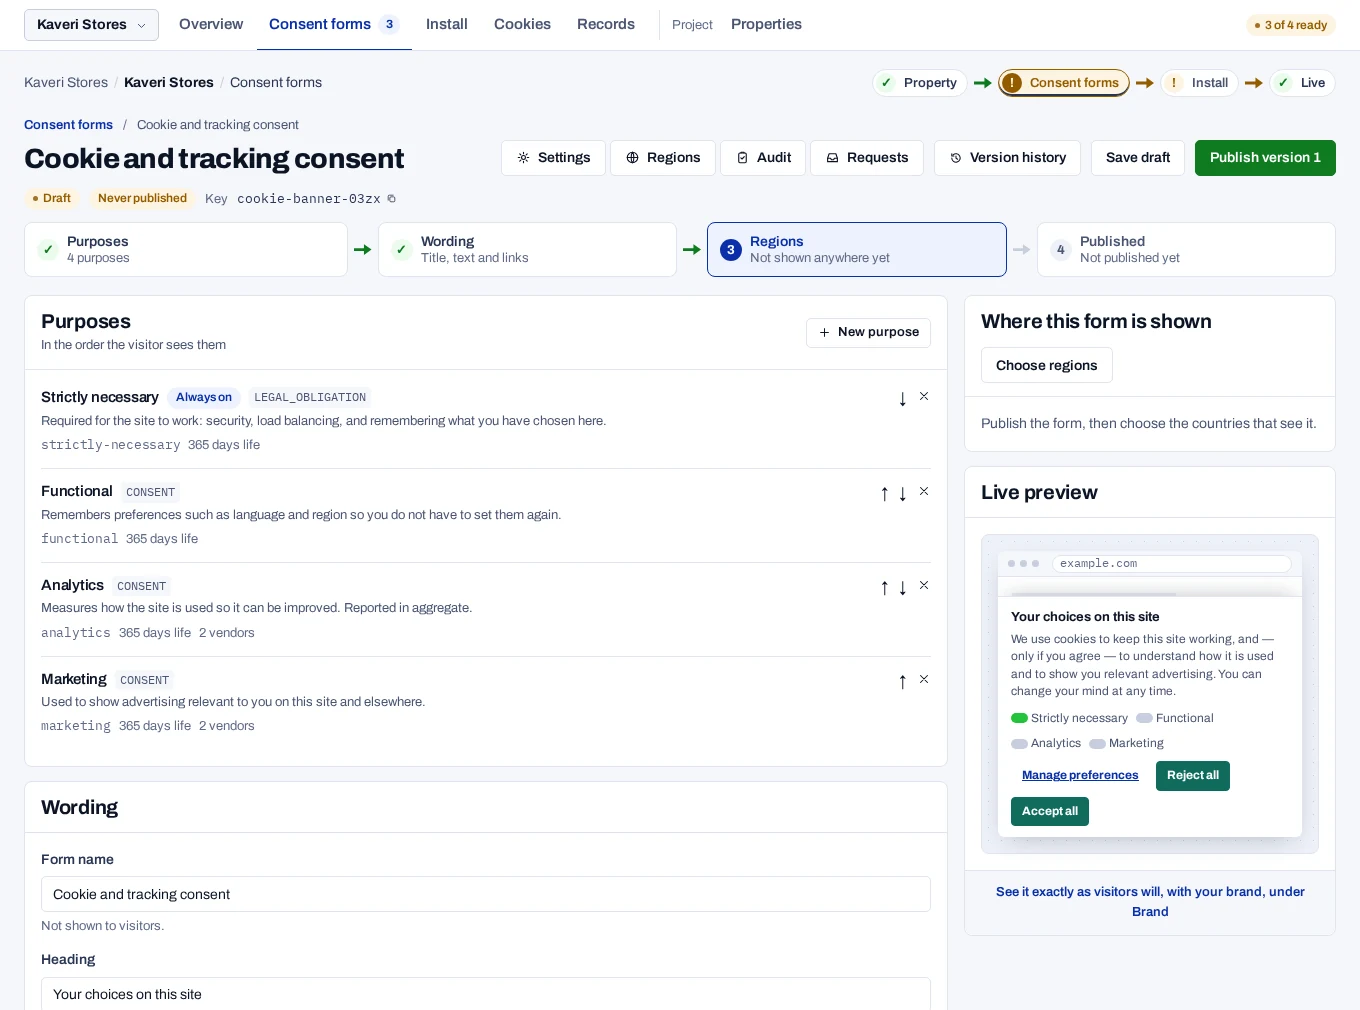
The form is a draft with your three purposes and a live preview of the banner. Visitors in India see the complaint link, which tells them how to complain to the Data Protection Board of India.
Publish#
Visitors only ever see a published version, never the draft.
- At the top of the form, choose Publish version 1.
- Choose Publish version 1 again to confirm.
The console confirms with Published version 1.
Choose where the form is shown#
A region rule shows a form to visitors from the places it covers.
- At the top of the form, choose Regions.
- Under Add a law, choose DPDP.
- Choose Everywhere else.
The form now has a rule for India, set to opt-in, and a rule for every other country. Rules take effect at once. If something a notice in India needs is missing, the console does not add the DPDP rule and says what is missing. Add it, publish the form again, then add the rule.
Countries without a rule see no banner
Visitors from a country that no rule covers are not asked, and your tags are not held back for them.
If the project's translation service is ready, the console also drafts the notice in India's 22 scheduled languages. Add Indian languages shows how to review and publish them.
Create a key#
The key connects your site to this property.
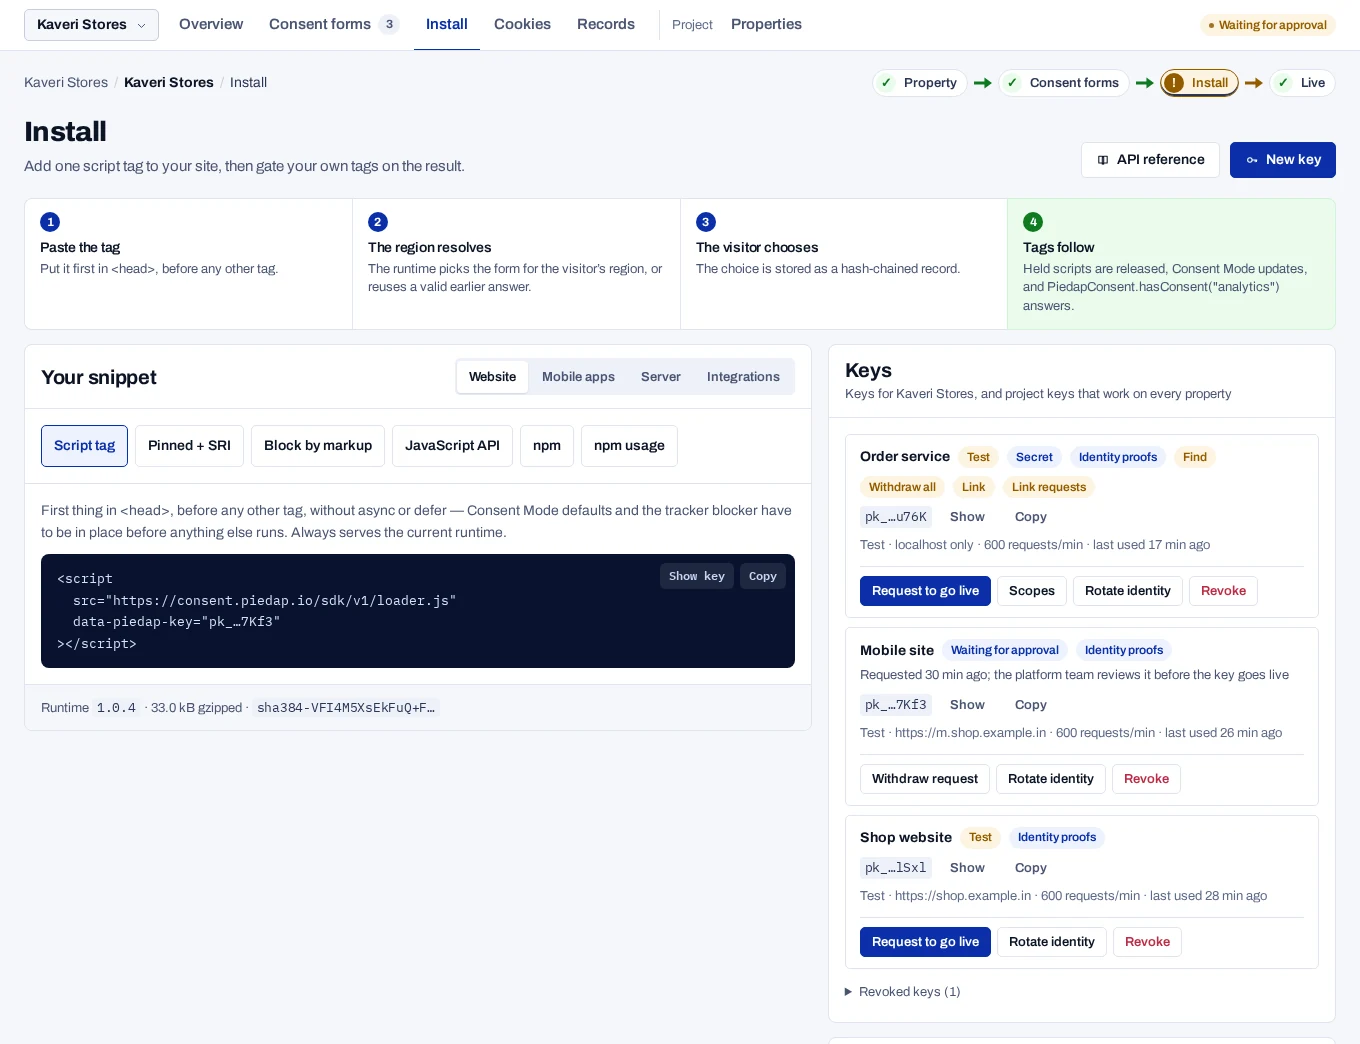
- Open Install and choose New key.
- Enter a Name that says where the key is used, such as
Shop website. - Check Allowed origins. They are filled in from the property.
- Choose Create key.
The Key created panel shows the Publishable key and an Identity secret. The identity secret is shown only once. Your developer needs it only to record consent under a signed-in visitor's account.
A new key is a test key. It works on localhost and on the origins you listed, and its records are kept apart from live data.
Install the snippet#
The snippet is one script tag that loads the banner on your site.
- On Install, find Your snippet and keep Script tag selected.
- Choose Copy. The copied snippet contains your full key.
- Ask your developer to paste it as the first thing inside
<head>, withoutasyncordefer.
Once the tag is on your site, the banner appears on a visitor's first visit.
Check what a visitor gets#
Try the runtime asks the same question your site asks: which form does a visitor from this place get?
- On Install, find Try the runtime.
- In the first box, replace the country code with
IN. - Choose Send.
You see the name of your form with OPT_IN and DPDP beside it, and a sentence saying which rule matched.
See the first record#
- Open your site in a browser, on one of the key's allowed origins.
- Answer the banner.
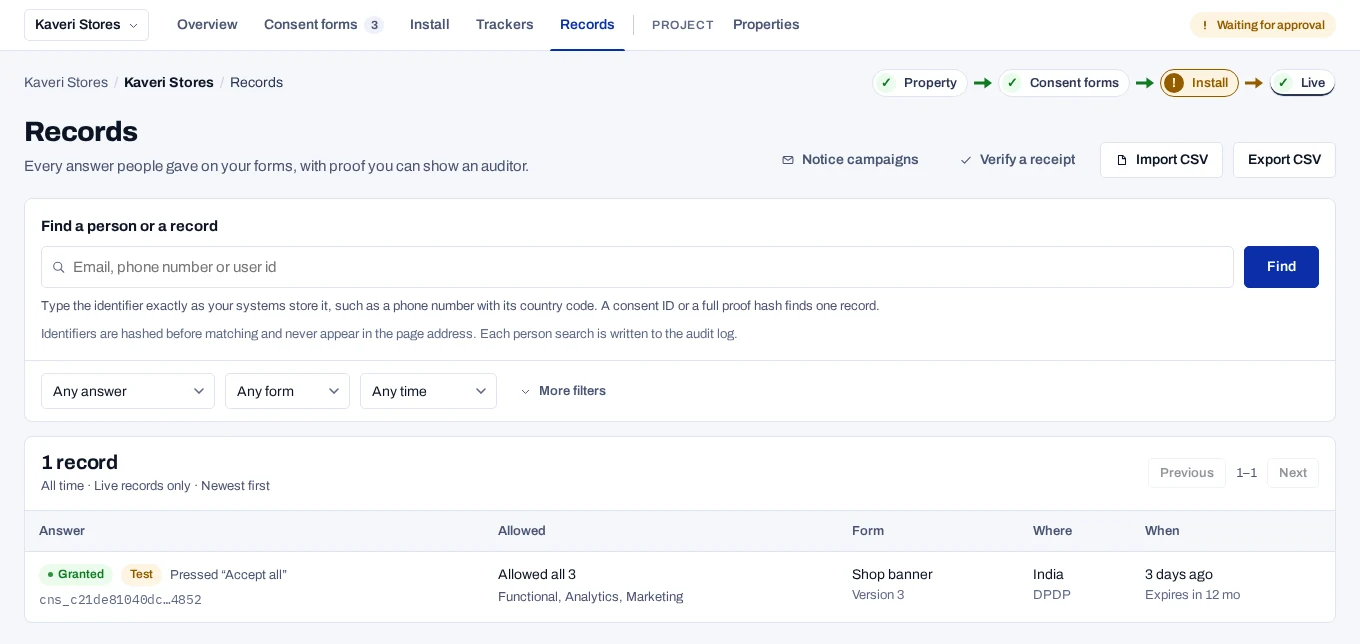
- In the console, open Records.
- Choose Show test records. The list starts on live records only.
The answer appears as a new row marked Test. Select it to see what was allowed, which form and version were shown, and the proof.
If no banner appears, see Banner and tag problems.
Next steps#
- Add Indian languages so visitors in India can read the notice in their own language.
- Go live so the key writes live records.
- Write the notice to improve the wording.
- Install on a website for your developer.