

Record consent for signed-in visitors
Have the banner record a signed-in visitor's answers under their account, with an identity proof your server computes.
The banner records answers under a random id it makes for the browser. To record them under the visitor's account, your server vouches for the visitor with an identity proof. The page then passes that proof to the banner.
Before you start#
- The loader tag is on the page. See Install on a website.
- You have the key's identity secret,
idv_…. It is shown once, in Key created. If it is lost, choose Rotate identity on the key in Install.
Add the proof to the page#
-
On your server, store the identity secret as
PIEDAP_IDENTITY_SECRET. It must never reach a browser or an app. -
Compute the proof for the signed-in visitor.
Node.jsJavaScript import { identityProof } from '@piedap/consent/server'; const identity = { subjectType: 'USER_ID', subjectId: user.id, proof: identityProof( process.env.PIEDAP_IDENTITY_SECRET, 'USER_ID', user.id, ), };Python import os from piedap_consent import identity_proof identity = { "subjectType": "USER_ID", "subjectId": user.id, "proof": identity_proof( os.environ["PIEDAP_IDENTITY_SECRET"], "USER_ID", user.id ), }Shell printf '%s' 'USER_ID:usr_8f2K1xQz' \ | openssl dgst -sha256 -hmac "$PIEDAP_IDENTITY_SECRET" -r \ | cut -d' ' -f1 -
Render the configuration into the page before the loader tag. The runtime reads it as it starts.
HTML <script> window.PiedapConsentConfig = { identity: { subjectType: 'USER_ID', subjectId: 'usr_8f2K1xQz', proof: '9f2c…' } }; </script> <script src="https://console.dpconsent.com/consent/sdk/v1/loader.js" data-piedap-key="pk_…"></script> -
Sign in on a test page and answer the banner.
-
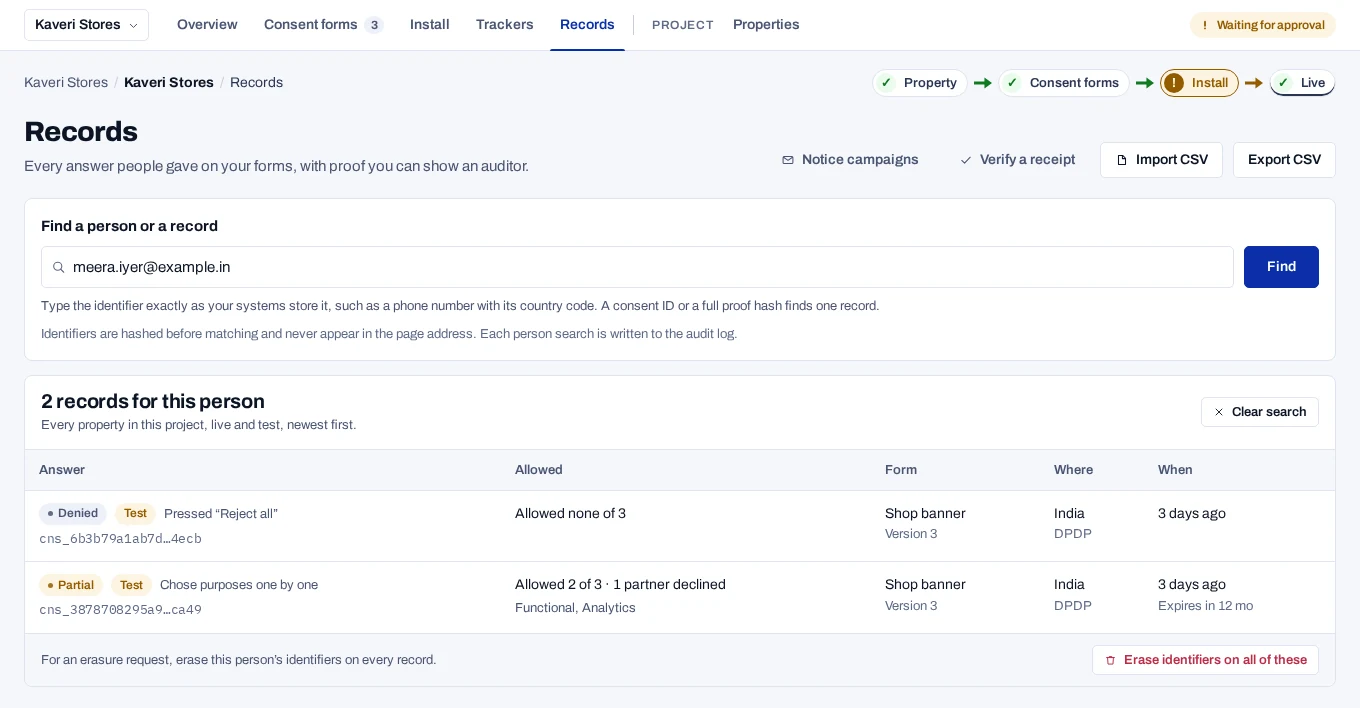
In the console, open Records, type the user id under Find a person or a record and choose Find.
The search lists the new record. subjectType in identity is USER_ID, EMAIL or PHONE.
The proof is the HMAC-SHA256 of subjectType:subjectId, keyed with the identity secret and written as 64 hex characters. It covers the exact text of subjectId, so sign the same string you put in the page. A proof stays valid until the identity secret is rotated.
Link the email address and phone number#
Add identifiers to the same configuration. The record can then be found, withdrawn and erased by any of them. An email address, phone number, user id or device id needs its own proof. A session id needs none.
const secret = process.env.PIEDAP_IDENTITY_SECRET;

const config = {
  identity,
  identifiers: [
    { subjectType: 'SESSION_ID', subjectId: session.id },
    {
      subjectType: 'EMAIL',
      subjectId: user.email,
      proof: identityProof(secret, 'EMAIL', user.email),
    },
  ],
};
The runtime sends identifiers with every answer from then on and does not store them. For a visitor who is not signed in, a page can link a session id later:
PiedapConsent.setIdentifiers([
  { subjectType: 'SESSION_ID', subjectId: 'sess_4Hq9x2' },
]);
For SESSION_ID, use an id that names the session but signs nobody in. Never send a session cookie or a login token.
If the answer is refused#
403 IDENTITY_PROOF_REQUIRED: the proof does not match. Check that the type and the id are the ones you signed, and that the identity secret was not rotated.403 IDENTIFIER_PROOF_REQUIRED: a linked email address, phone number, user id or device id has no valid proof.
The runtime leaves out a linked identifier that needs a proof and has none. If the API still refuses a proof, the runtime records the answer again without the identifiers, so the answer is not lost.
Escape JSON in an inline script
When you write the configuration into an inline script, escape <, > and &, so that a value cannot close the script tag.